
If you’ve ever enjoyed a hearty breakfast at Dairy Queen and wondered how to make it at home, this dairy queen gravy recipe is exactly what you need. It recreates the signature creamy, comforting flavor that makes DQ breakfasts so satisfying and memorable.
This copycat dairy queen gravy recipe delivers the same rich, velvety texture using simple pantry staples. Ready in about 15 minutes, it’s an approachable option for home cooks who want authentic results without complicated steps.
Perfect over biscuits, fried chicken, or potatoes, this DQ gravy recipe doubles as a white gravy recipe easy enough for busy mornings or cozy weekend meals. It’s a versatile, restaurant-style gravy you’ll want to make again and again.
What is Dairy Queen Gravy and How Does It Taste?
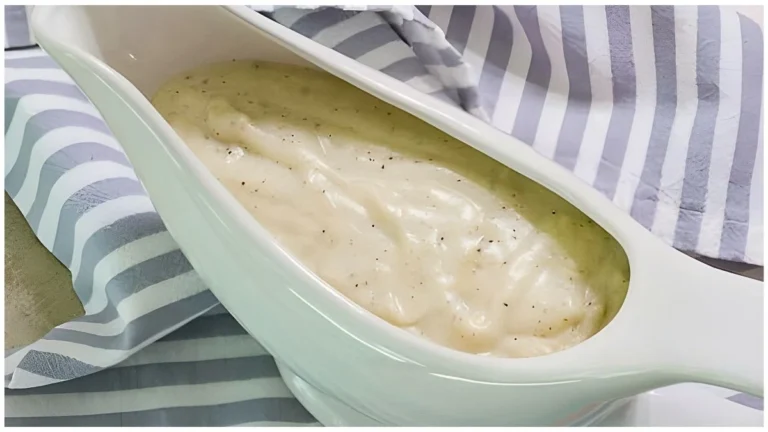
Dairy Queen country gravy is a classic Southern-style white gravy, also known as cream gravy or country-style gravy. This beloved breakfast staple features a silky-smooth, creamy texture with a savory, buttery flavor profile that’s neither too heavy nor too bland.

The gravy has a beautiful ivory color and perfectly balanced seasoning with subtle hints of black pepper. Unlike brown gravy made with meat drippings, this white gravy recipe uses a simple butter and flour roux combined with milk to create that signature DQ taste.
The consistency is thick enough to generously coat a warm biscuit without being gloppy, and the flavor is comforting and mild with just the right amount of peppery bite. It’s the kind of gravy that tastes homemade, nostalgic, and utterly satisfying.
Dairy Queen Gravy Recipe Ingredients You’ll Need
Main Ingredients:
- 4 tablespoons (1/2 stick) unsalted butter
- 1/4 cup all-purpose flour
- 2 cups whole milk (or 2% milk for a lighter version)
- 1/2 teaspoon kosher salt (plus more to taste)
- 1/4 teaspoon freshly ground black pepper (plus more to taste)
- Optional: a pinch of cayenne pepper for subtle heat
Essential Kitchen Utensils:
- Medium saucepan or skillet
- Wire whisk
- Measuring cups and spoons
- Wooden spoon or rubber spatula
Preparation and Cooking Time
Prep Time: 2 minutes
Cook Time: 10-12 minutes
Total Time: 12-15 minutes
Servings: 4-6 servings (approximately 2 cups of gravy)
Step-by-Step Dairy Queen Gravy Recipe Instructions
Step 1: Melt the Butter Place a medium saucepan or skillet over medium heat. Add the 4 tablespoons of unsalted butter and let it melt completely until it starts to bubble slightly. Watch carefully to ensure the butter doesn’t brown.
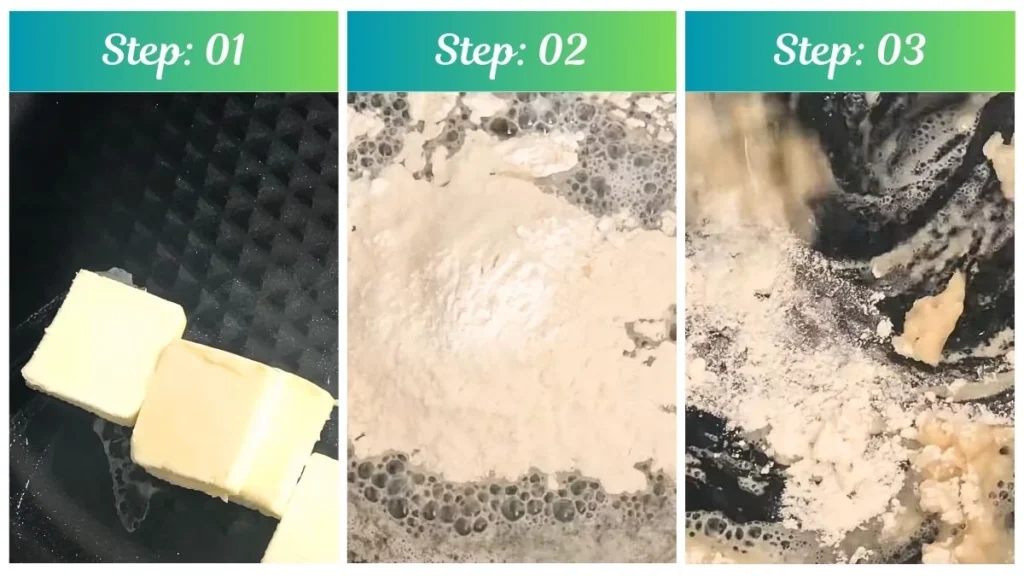
Step 2: Make the Roux Once the butter is melted and bubbling, whisk in the 1/4 cup of all-purpose flour. Cook the mixture, stirring constantly with a whisk, for about 2-3 minutes. This step is crucial for removing the raw flour taste. The roux should turn a light golden or blonde color-keep it pale and don’t let it get too dark, as this maintains the white gravy appearance.
Step 3: Add the Milk Gradually Slowly pour in the milk while whisking constantly to prevent lumps from forming. Start with a small amount (about 1/4 cup) and whisk until completely smooth, then gradually add the remaining milk. Keep whisking continuously until all 2 cups of milk are incorporated into the roux.
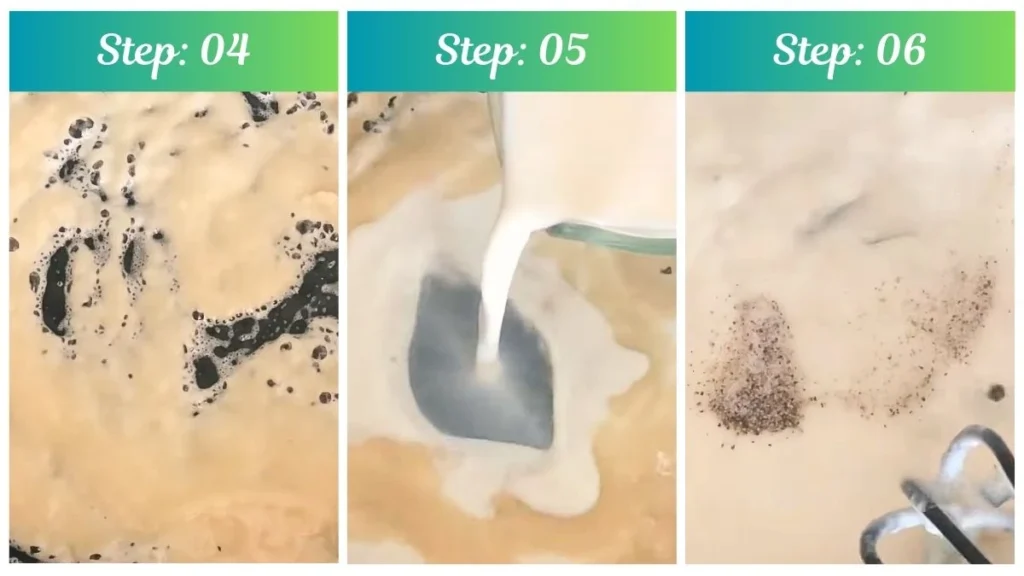
Step 4: Simmer and Thicken Continue cooking the gravy over medium heat, whisking frequently, for 5-8 minutes until it thickens to your desired consistency. The gravy should coat the back of a spoon when it’s ready. Remember that it will continue to thicken slightly as it cools.
Step 5: Season to Perfection Stir in the 1/2 teaspoon kosher salt and 1/4 teaspoon freshly ground black pepper. If you’re using cayenne pepper, add a small pinch now. Taste the gravy and adjust the seasoning, adding more salt or pepper as needed to match your preferences.
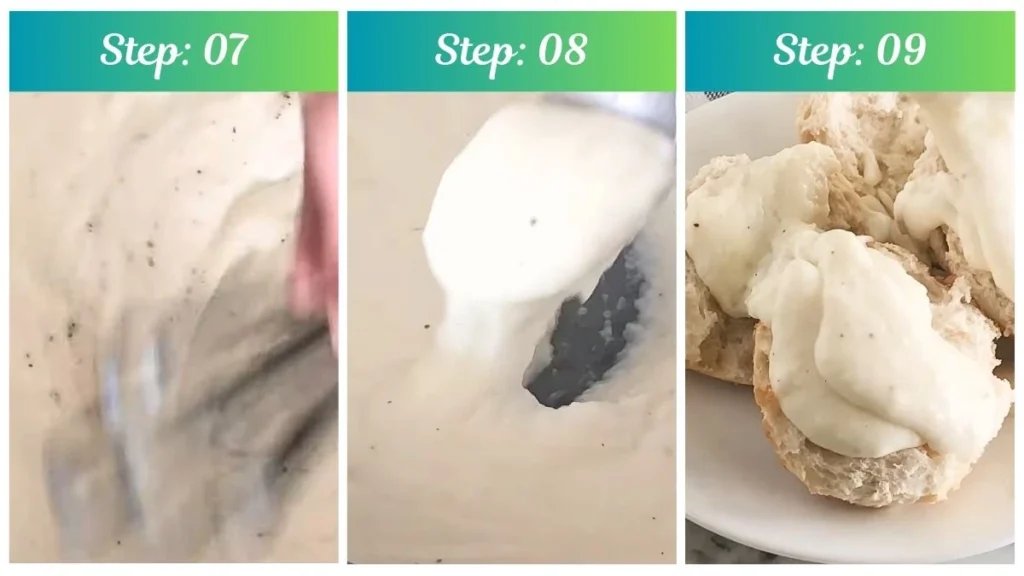
Step 6: Serve Hot Remove the saucepan from heat and serve the gravy immediately over warm biscuits, mashed potatoes, fried chicken, or your favorite breakfast items. If the gravy becomes too thick while sitting, simply whisk in a splash of milk to thin it out to the perfect consistency.
Customization and Pairing Ideas for Serving
1. Classic Biscuits and Gravy The most traditional way to enjoy this dairy queen white gravy is ladled generously over freshly baked buttermilk biscuits. Split warm, fluffy biscuits in half and smother them with this creamy gravy for an authentic Southern breakfast that rivals any restaurant version.
2. Chicken Fried Steak Topping Transform your homemade or store-bought chicken fried steak into a restaurant-worthy meal by drizzling this DQ-style country gravy over the crispy breaded cutlets. The creamy gravy perfectly complements the crunchy coating and tender beef.
3. Mashed Potato Enhancer Pour this white gravy over creamy mashed potatoes for a comforting side dish that pairs beautifully with roasted chicken, meatloaf, or pork chops. The buttery gravy adds richness and moisture to every bite.
4. Breakfast Bowl Base Create a hearty breakfast bowl by combining scrambled eggs, crumbled breakfast sausage, hash browns, and shredded cheese, then topping everything with this savory gravy for an all-in-one morning meal.
5. Fried Chicken Companion Whether you’re serving crispy fried chicken, chicken tenders, or popcorn chicken, this copycat dairy queen gravy makes an excellent dipping sauce or drizzle that adds creamy, peppery flavor to every piece.
6. Vegetable Medley Enhancement Elevate steamed or roasted vegetables like green beans, carrots, or cauliflower by finishing them with a spoonful of this white gravy. It’s an excellent way to make vegetables more appealing, especially for picky eaters.
7. Open-Faced Sandwich Drizzle Use this gravy to create delicious open-faced turkey or roast beef sandwiches. Place sliced meat on toasted bread, add the gravy, and serve with a side of cranberry sauce for a comforting lunch option.

Expert Tips for Perfect DQ Gravy
1. Temperature Control is Crucial Maintain consistent medium heat throughout the cooking process when making this dq gravy recipe. If the heat is too high, the roux can burn and create a bitter taste, while too-low heat won’t properly cook the flour or thicken the gravy. Watch for gentle bubbling-not vigorous boiling-as your temperature indicator.
2. Whisk Constantly for Lump-Free Gravy The secret to smooth, creamy gravy is continuous whisking, especially when adding the milk to the roux. Lumps form when flour clumps aren’t properly broken down, so use a wire whisk and maintain constant motion during the milk incorporation stage. If you do get lumps, strain the gravy through a fine-mesh sieve.
3. Room Temperature Milk Works Better While you can use cold milk straight from the refrigerator, letting it sit at room temperature for 10-15 minutes before cooking helps it incorporate more smoothly into the roux and reduces the chance of the mixture seizing up or forming lumps.
4. Adjust Thickness to Your Preference Gravy thickness is personal preference. For thicker gravy similar to what you’d get at Dairy Queen, cook it a bit longer until it heavily coats the spoon. For thinner gravy that’s easier to pour, add an extra 1/4 to 1/2 cup of milk. Remember that the gravy will thicken as it cools.
5. Season Gradually and Taste Frequently Salt levels can vary depending on the butter you use and personal taste preferences. Start with the recommended 1/2 teaspoon, then taste and adjust. It’s easier to add more seasoning than to fix over-salted gravy. Freshly cracked black pepper provides better flavor than pre-ground varieties.
6. Use Quality Butter for Better Flavor Since butter is a primary flavor component in this white gravy recipe easy preparation, using high-quality unsalted butter makes a noticeable difference. Unsalted butter gives you better control over the final seasoning and typically has a fresher, creamier taste than salted varieties.
7. Make a Double Batch for Meal Prep This copycat dairy queen gravy recipe doubles easily, and having extra gravy on hand during busy mornings is incredibly convenient. The recipe scales perfectly-just use a larger saucepan and increase all ingredients proportionally while maintaining the same cooking times and techniques.
Storage and Reheating Guidance
Store leftover dairy queen country gravy in an airtight container in the refrigerator for up to 3-4 days. To reheat, warm gently in a saucepan over low heat, whisking frequently and adding a splash of milk to restore the creamy consistency. You can also microwave in 30-second intervals, stirring between each, until heated through.
Dairy Queen Gravy Recipe

If you’ve ever enjoyed a hearty breakfast at Dairy Queen and wondered how to make it at home, this dairy queen gravy recipe is exactly what you need. It recreates the signature creamy, comforting flavor that makes DQ breakfasts so satisfying and memorable.
Ingredients
- 4 tablespoons (1/2 stick) unsalted butter
- 1/4 cup all-purpose flour
- 2 cups whole milk (or 2% milk for a lighter version)
- 1/2 teaspoon kosher salt (plus more to taste)
- 1/4 teaspoon freshly ground black pepper (plus more to taste)
- Optional: a pinch of cayenne pepper for subtle heat
Instructions
Step 1: Melt the Butter Place a medium saucepan or skillet over medium heat. Add the 4 tablespoons of unsalted butter and let it melt completely until it starts to bubble slightly. Watch carefully to ensure the butter doesn’t brown.
Step 2: Make the Roux Once the butter is melted and bubbling, whisk in the 1/4 cup of all-purpose flour. Cook the mixture, stirring constantly with a whisk, for about 2-3 minutes. This step is crucial for removing the raw flour taste. The roux should turn a light golden or blonde color-keep it pale and don’t let it get too dark, as this maintains the white gravy appearance.
Step 3: Add the Milk Gradually Slowly pour in the milk while whisking constantly to prevent lumps from forming. Start with a small amount (about 1/4 cup) and whisk until completely smooth, then gradually add the remaining milk. Keep whisking continuously until all 2 cups of milk are incorporated into the roux.
Step 4: Simmer and Thicken Continue cooking the gravy over medium heat, whisking frequently, for 5-8 minutes until it thickens to your desired consistency. The gravy should coat the back of a spoon when it’s ready. Remember that it will continue to thicken slightly as it cools.
Step 5: Season to Perfection Stir in the 1/2 teaspoon kosher salt and 1/4 teaspoon freshly ground black pepper. If you’re using cayenne pepper, add a small pinch now. Taste the gravy and adjust the seasoning, adding more salt or pepper as needed to match your preferences.
Step 6: Serve Hot Remove the saucepan from heat and serve the gravy immediately over warm biscuits, mashed potatoes, fried chicken, or your favorite breakfast items. If the gravy becomes too thick while sitting, simply whisk in a splash of milk to thin it out to the perfect consistency.
Notes
Store leftover dairy queen country gravy in an airtight container in the refrigerator for up to 3-4 days. To reheat, warm gently in a saucepan over low heat, whisking frequently and adding a splash of milk to restore the creamy consistency. You can also microwave in 30-second intervals, stirring between each, until heated through.
Nutrition Information:
Yield:
6Serving Size:
1Amount Per Serving: Calories: 90
Common Questions About Dairy Queen Gravy Recipe
Can I use a different type of milk for this DQ gravy recipe?
Yes, you can use 2% milk, 1% milk, or even half-and-half depending on your preference. Whole milk creates the richest, creamiest texture closest to restaurant-style gravy, while lower-fat milks produce a lighter version. Half-and-half makes an extra-indulgent gravy. Avoid skim milk as it may result in thinner, less flavorful gravy.
How do I fix lumpy gravy?
If your white gravy develops lumps, don’t worry-it’s fixable! Pour the gravy through a fine-mesh strainer into another bowl or pan, pressing the lumps through with a spoon. Alternatively, use an immersion blender to smooth out any clumps. Prevention is best: whisk constantly when adding milk to the roux.
Can I make this dairy queen white gravy ahead of time?
Absolutely! You can prepare this gravy up to 2 days in advance. Store it covered in the refrigerator and reheat gently on the stovetop, adding milk as needed to achieve the proper consistency. The flavor actually develops nicely overnight, making it an excellent make-ahead option for breakfast gatherings.
Why is my gravy too thick or too thin?
Gravy thickness depends on cooking time and the flour-to-liquid ratio. If too thick, whisk in milk one tablespoon at a time until reaching desired consistency. If too thin, create a slurry with 1 tablespoon flour and 2 tablespoons milk, whisk it in, and simmer for 2-3 more minutes until thickened.
Can I freeze this copycat dairy queen gravy recipe?
While you can freeze white gravy for up to 3 months, the texture may become slightly grainy when thawed due to milk separation. To freeze, cool completely, transfer to freezer-safe containers, and thaw overnight in the refrigerator. Reheat slowly, whisking vigorously, and add fresh milk to restore smoothness.
What’s the difference between white gravy and brown gravy?
White gravy (country gravy) uses butter, flour, and milk to create a pale, creamy sauce with a mild, peppery flavor. Brown gravy uses meat drippings, broth, and sometimes browning agents, resulting in a darker color and richer, meatier taste. This DQ-style recipe is definitely a white gravy perfect for breakfast dishes.
Can I add sausage to make this a sausage gravy?
Yes! To transform this dairy queen country gravy into sausage gravy, brown 1/2 to 3/4 pound of breakfast sausage in the pan first, then add the butter and proceed with the recipe. The sausage adds savory depth and makes it even more filling for breakfast biscuits.
This copycat dairy queen gravy recipe proves that restaurant-quality white gravy is completely achievable in your home kitchen with simple ingredients and straightforward techniques. Whether you’re serving it over fluffy biscuits for Sunday breakfast, topping crispy fried chicken for dinner, or creating comforting breakfast bowls for the family, this DQ gravy delivers authentic flavor every time.
The beauty of mastering how to make dairy queen gravy lies in its versatility and quick preparation-perfect for busy mornings or leisurely weekend brunches. Save this white gravy recipe easy method, and you’ll never need to wait in line for that signature Dairy Queen taste again. Give it a try and taste the creamy, peppery perfection for yourself!
We’d love to hear how this recipe turns out for you! Give it a try, then drop a comment below to share your thoughts and tips with us.
You can also follow us on Pinterest, and YouTube for more delicious updates and kitchen inspiration. Your feedback and support mean the world to us!