
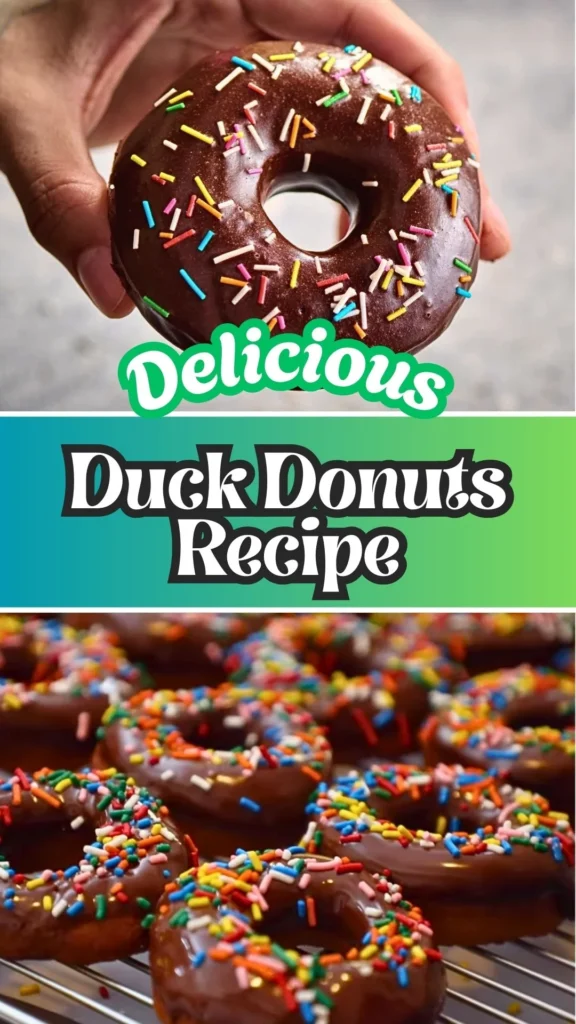
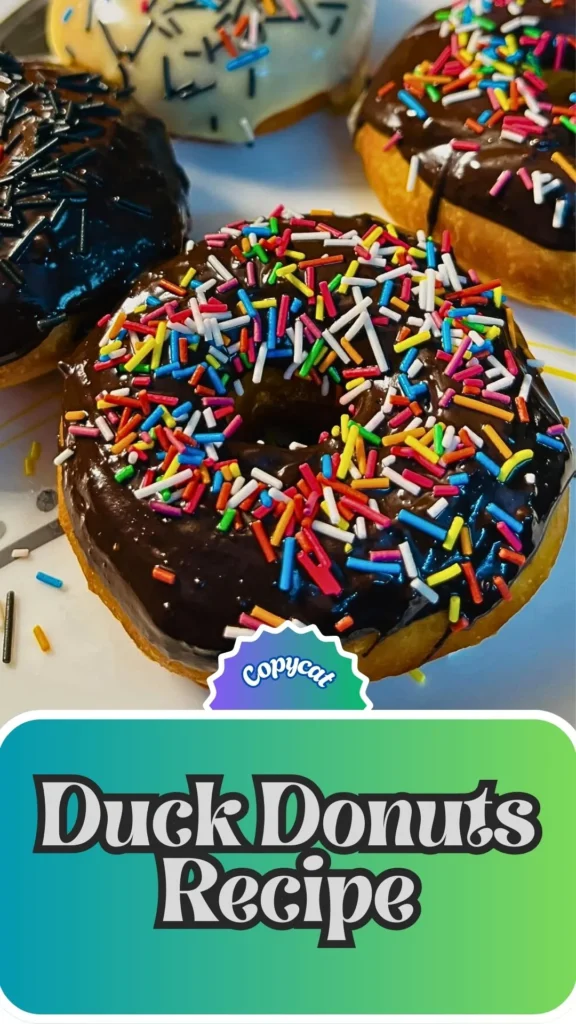
Craving those irresistible Duck Donuts but don’t want to leave your kitchen? This duck donuts copycat recipe brings the magic of the beloved donut shop right to your home.
Whether you’re a seasoned baker or just starting your donut-making journey, this duck donuts recipe delivers soft, pillowy cake donuts with that signature texture everyone loves.
Learn how to make duck donuts from scratch with simple ingredients and straightforward techniques that guarantee bakery-quality results.
This duck donuts batter recipe creates the perfect foundation for endless customization, making it ideal for family breakfast traditions, weekend brunch gatherings, or satisfying those mid-afternoon sweet cravings.
What Does Duck Donuts Taste Like?
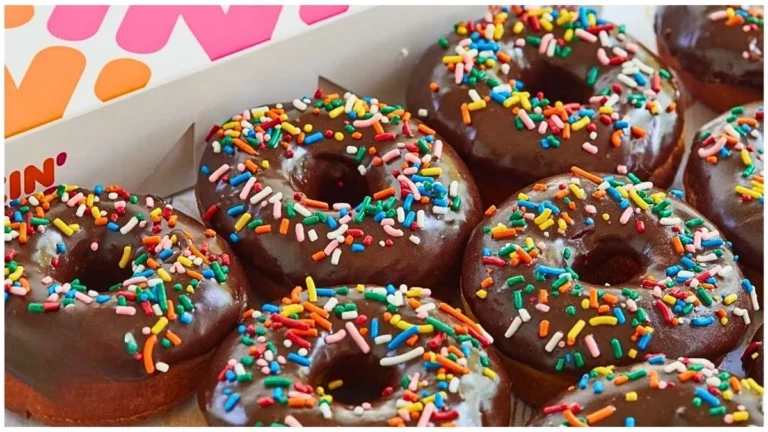
This cake donut recipe produces donuts with a tender, melt-in-your-mouth crumb that’s subtly sweet and buttery. The exterior develops a delicate golden crust during frying, while the interior stays incredibly soft and fluffy-never dense or heavy.
The vanilla undertones complement whatever toppings you choose, from rich chocolate frosting to classic cinnamon sugar. Each bite delivers that signature duck donuts experience: light yet satisfying, with a cake-like texture that’s less airy than yeast donuts but infinitely more comforting.
The warm donut paired with smooth chocolate glaze creates an indulgent flavor combination that rivals any specialty donut shop.
Duck Donuts Recipe Ingredients and Kitchen Utensils
Ingredients
For the Dough:
- 4 cups (500g) all-purpose flour
- ¼ cup (50g) granulated sugar
- 1 teaspoon salt
- 2¼ teaspoons (1 packet / 7g) instant yeast
- 1 cup (240ml) whole milk
- ¼ cup (60g) unsalted butter
- 1 teaspoon vanilla extract
For Frying:
- 3–4 cups vegetable oil (or sunflower/canola oil)
Topping:
- 1½ cups chocolate frosting (store-bought or homemade)
- Sprinkles (optional)
Kitchen Utensils Needed:
- Stand mixer with dough hook (or mixing bowl for hand kneading)
- Microwave-safe bowl
- Rolling pin
- 3-inch round cookie cutter
- Small round cutter for donut holes
- Heavy-bottomed saucepan or deep fryer
- Cooking thermometer (optional but recommended)
- Paper towels
- Cooling rack
- Parchment paper
Preparation and Cooking Time:
Prep Time: 20 minutes
First Proof: 1½ – 2 hours
Second Proof: 20-30 minutes
Frying Time: 15-20 minutes
Total Time: Approximately 2 hours 45 minutes
Servings: 12-14 donuts plus donut holes
Duck Donuts Recipe Instructions
Step 1: Make the Dough
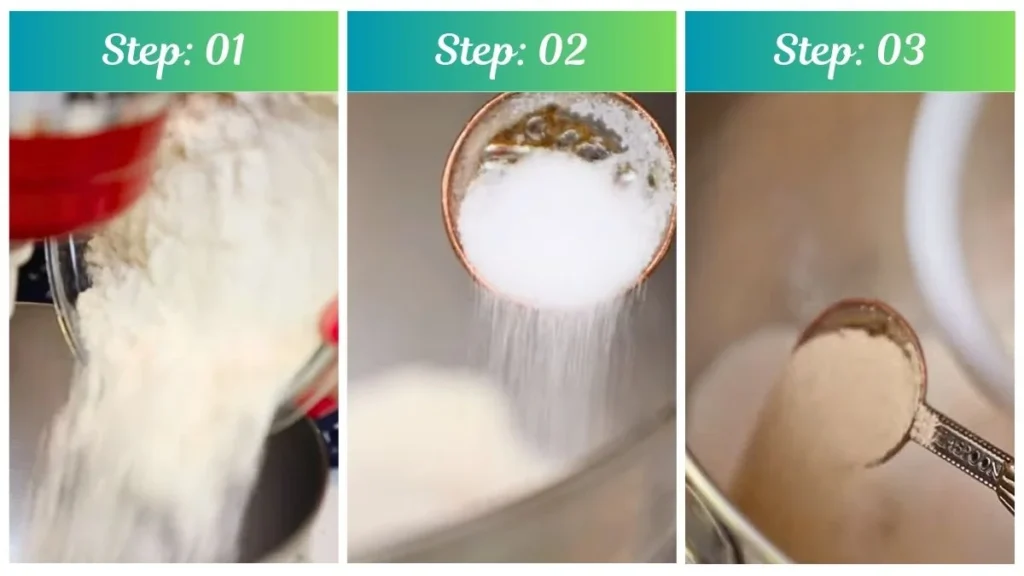
In the bowl of a stand mixer, add flour, sugar, salt, and instant yeast. Mix briefly to combine using the dough hook attachment. If using active dry yeast instead, activate it first in warm milk before proceeding. In a microwave-safe bowl, combine milk and butter. Heat for 30-45 seconds until the butter melts completely and the milk reaches a warm temperature-not hot, as excessive heat can kill the yeast. Stir vanilla extract into the warm milk mixture until well incorporated.
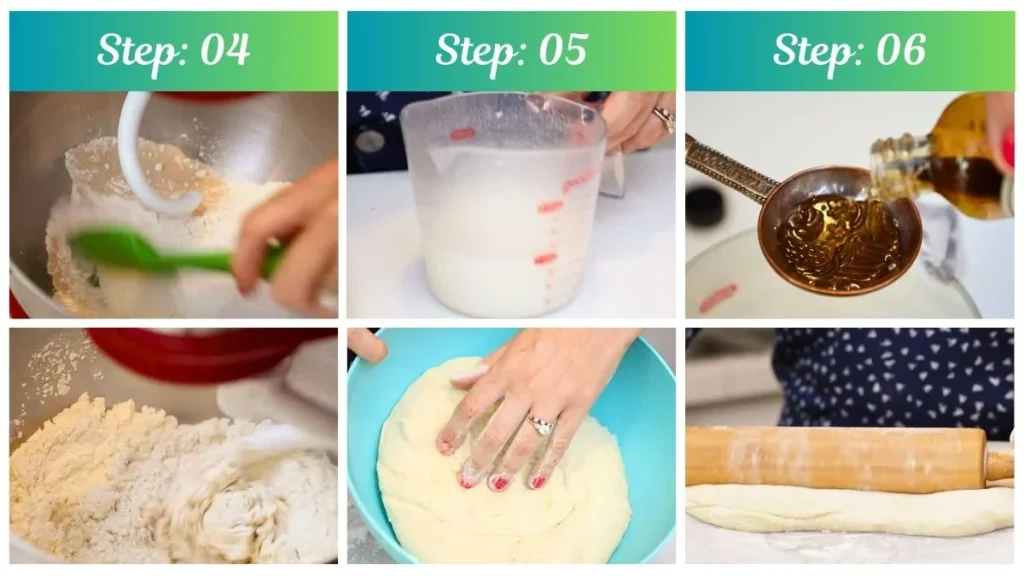
Turn the mixer to medium speed and slowly pour the wet mixture into the dry ingredients. Mix until the dough comes together into a shaggy mass. Knead for 6–8 minutes on medium speed until the dough becomes soft, smooth, and slightly elastic. The dough should pull away from the sides of the bowl. If kneading by hand, work the dough on a lightly floured surface for about 10 minutes until it develops elasticity and becomes smooth to the touch.
Step 2: First Proof
Lightly oil a clean bowl with vegetable oil, ensuring the entire interior surface is coated. Place the dough into the bowl, turning it over once to coat all sides lightly in oil. This prevents the dough from drying out during proofing. Cover tightly with plastic wrap or a clean kitchen towel and let it proof in a warm, draft-free place for 1½ to 2 hours. The dough should double in size and feel fluffy and airy when gently pressed.
Step 3: Shape the Donuts
Turn the proofed dough onto a lightly floured work surface. Gently press it down to release excess air. Using a rolling pin, roll out the dough to about ½ inch thickness. For slightly larger, fluffier donuts, aim for closer to ¾ inch thickness. Using a 3-inch round cutter dipped in flour, cut out circles by pressing straight down without twisting. This ensures clean edges that puff up nicely when fried. Use a smaller cutter (about 1 inch) to cut out the center holes. Remove the centers carefully. Place the shaped donuts on a tray lined with parchment paper, spacing them about 2 inches apart. Gather the donut holes and set them aside separately-they’ll proof and fry faster than the full donuts.
Step 4: Second Proof
Cover the donuts loosely with plastic wrap and drape a clean kitchen towel over the top to maintain humidity. Let proof for 20–30 minutes in a warm spot until the donuts become puffy, slightly rounded, and spring back slowly when gently touched. Don’t over-proof, or they may absorb too much oil during frying.
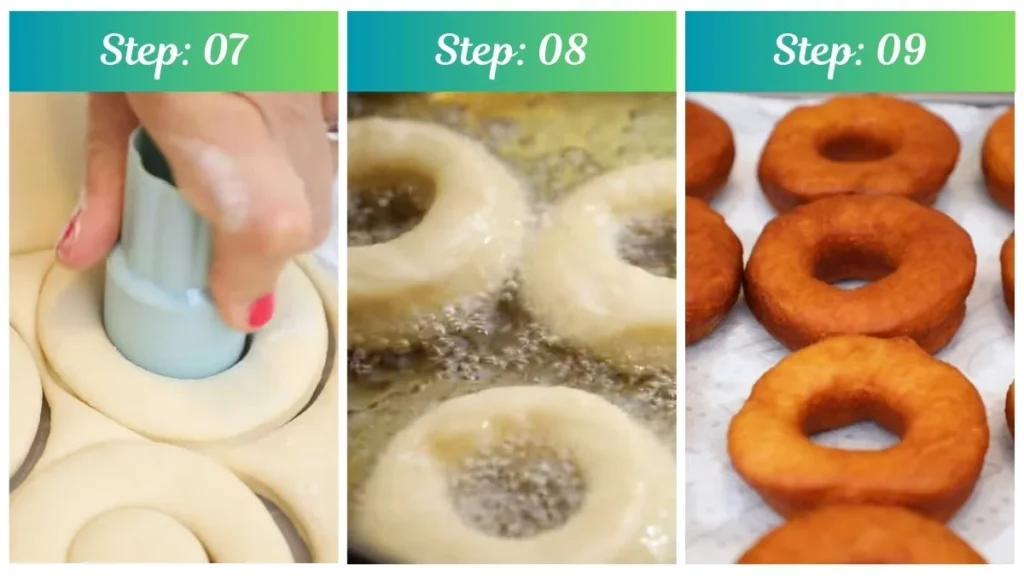
Step 5: Fry the Donuts
In a heavy-bottomed saucepan or Dutch oven, add oil to a depth of 2–3 inches. The vessel should be deep enough that oil won’t overflow when donuts are added. Heat oil over medium heat until it reaches approximately 350°F (175°C) on a cooking thermometer. If you don’t have a thermometer, test by dropping a small piece of dough into the oil-it should sizzle immediately and rise to the surface. Carefully slide 4–5 donuts into the hot oil using a slotted spoon or spider strainer.
Don’t overcrowd the pan, as this lowers the oil temperature. Fry for 2–3 minutes on the first side until they develop a beautiful golden-brown color. Flip gently using chopsticks or a slotted spoon and fry for another 2 minutes until evenly browned on both sides. Remove donuts and place on a tray lined with several layers of paper towels to absorb excess oil. Let them drain briefly. Fry the donut holes separately-they’ll cook slightly faster, usually 1-2 minutes per side.
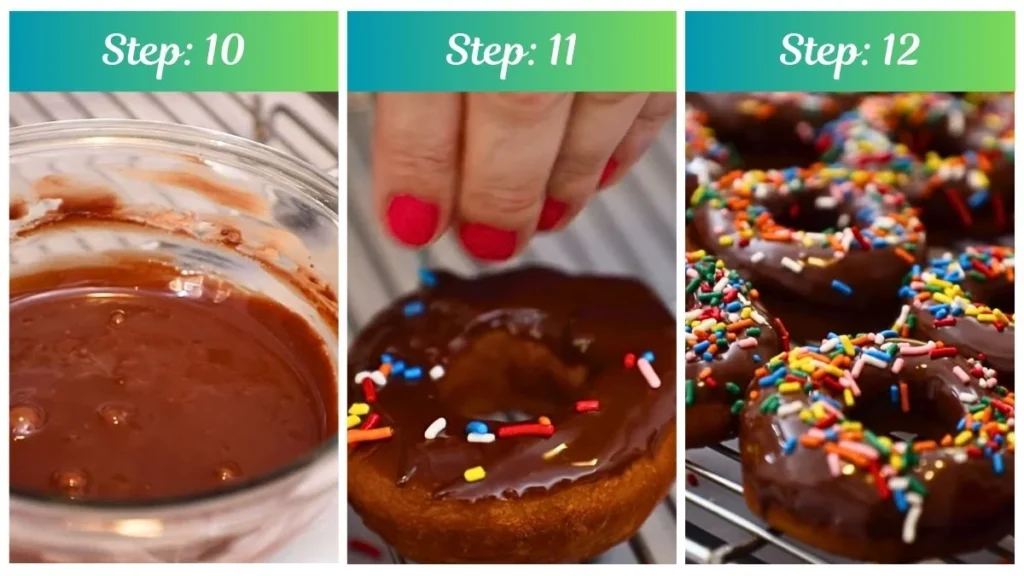
Step 6: Frost and Decorate
While the donuts are still warm (but not hot), dip the top of each donut into chocolate frosting. Hold the donut upside down and gently twist to ensure even coverage. Let excess frosting drip back into the bowl, then place the donut right-side up on a cooling rack set over parchment paper. Immediately add sprinkles, crushed cookies, or other toppings before the glaze sets-they need to stick to wet frosting. Allow the frosting to set for 10-15 minutes before serving for the best texture and appearance.
Customization and Pairing Ideas for Serving
Transform your duck donuts copycat recipe into an endless variety of flavors with these creative customization options that rival any specialty donut shop menu.
1. Classic Cinnamon Sugar Coating
Skip the chocolate frosting and instead toss warm donuts in a mixture of granulated sugar and ground cinnamon. This timeless combination offers a lighter alternative that lets the donut’s natural flavor shine. The warmth of the donut melts the sugar slightly, creating an irresistible crystalline coating.
2. Maple Bacon Extravaganza
Replace chocolate frosting with maple glaze (combine powdered sugar with maple syrup and milk) and top with crispy, crumbled bacon pieces. This sweet-and-savory pairing has become a modern donut classic, offering textural contrast and sophisticated flavor complexity that adults especially appreciate.
3. Berry Bliss Variation
Use strawberry or raspberry frosting and top with freeze-dried berry powder or fresh berry slices. This fruity twist adds brightness and visual appeal, making it perfect for spring brunches or Mother’s Day celebrations. The tartness of berries balances the donut’s sweetness beautifully.
4. Cookies and Cream Dream
Frost with vanilla glaze and immediately press crushed Oreo cookies into the wet frosting. This crowd-pleasing option appeals especially to children and creates an Instagram-worthy presentation that’s sure to impress at any gathering.
5. Pairing with Coffee and Beverages
Serve your homemade cake donuts alongside freshly brewed coffee, espresso, or cappuccino for the ultimate café experience at home. The bitterness of coffee perfectly complements the donut’s sweetness. For non-coffee drinkers, cold milk, hot chocolate, or chai tea lattes make excellent companions.
6. Donut Breakfast Board
Create an impressive spread by arranging donuts with various toppings alongside fresh fruit, yogurt parfaits, and scrambled eggs. This brunch-style presentation allows guests to customize their experience and turns duck donuts into the centerpiece of a memorable morning gathering.
7. Filled Donut Variation
Use a piping bag fitted with a long tip to inject jam, custard, or cream filling into the side of each donut before frosting. This technique transforms the basic duck donuts batter recipe into elegant filled pastries that taste like they came from an upscale bakery. Popular fillings include raspberry jam, lemon curd, vanilla custard, or chocolate ganache.
Essential Tips for Perfect Duck Donuts
Master the art of how to make duck donuts with these professional techniques that ensure consistent, bakery-quality results every single time.
1. Temperature Control is Everything
The success of this cake donut recipe heavily depends on maintaining proper temperatures throughout. When warming milk for the dough, aim for 105-110°F-warm enough to activate yeast but not so hot that it kills it. During frying, keep oil at a steady 350°F. Too cool, and donuts absorb excessive oil becoming greasy; too hot, and they brown outside while remaining raw inside. Invest in an instant-read thermometer for foolproof results.
2. Don’t Rush the Proofing Process
Patience during both proofing stages dramatically impacts your donut’s texture. Under-proofed dough yields dense, tough donuts, while properly proofed dough creates those signature light, airy duck donuts everyone craves. The dough should genuinely double in size during the first proof-this can take longer in cooler kitchens. Create a warm proofing environment by turning your oven on for one minute, then turning it off and placing the covered dough inside.
3. Flour Quality and Measurement Matters
Use fresh all-purpose flour and measure it correctly by spooning it into measuring cups and leveling off, rather than scooping directly from the bag which compacts flour and adds too much. Too much flour creates dry, crumbly donuts, while too little makes sticky dough that’s difficult to shape. If your dough feels excessively sticky after kneading, add flour one tablespoon at a time until manageable.
4. Gentle Handling Preserves Texture
When rolling and cutting your duck donuts batter recipe, handle the dough gently to preserve the air bubbles created during proofing. Press your cutters straight down without twisting, which can seal the edges and prevent proper puffing during frying. Similarly, when transferring proofed donuts to hot oil, slide them in gently rather than dropping them to maintain their shape.
5. Fry in Small Batches
Resist the temptation to fry too many donuts at once. Overcrowding drops the oil temperature significantly, resulting in greasy, undercooked donuts that absorb excess oil. Frying 4-5 donuts at a time allows proper temperature recovery between batches and gives you adequate space to flip them without splashing. Use a spider strainer or slotted spoon for safe, controlled flipping.
6. Frost While Warm for Best Adhesion
The timing of frosting application significantly affects the final result. Donuts should be warm (not hot) when dipped in frosting-this allows the glaze to melt slightly and create that iconic smooth coating seen on professional duck donuts. If donuts cool completely, the frosting sits on top rather than creating a unified layer. However, if they’re too hot, the frosting becomes too thin and slides off entirely.
7. Fresh is Always Best
While this duck donuts copycat recipe yields impressive results, donuts taste absolutely best within 4-6 hours of frying. The texture remains optimal, the frosting stays glossy, and the overall eating experience matches what you’d get at the donut shop itself. If making ahead is necessary, fry the donuts but wait to frost them until closer to serving time. This preserves both texture and appearance for maximum impact when presenting to guests.
Storage and Reheating Guidance
Store unfrosted donuts in an airtight container at room temperature for up to 2 days. Frosted donuts are best consumed within 24 hours. Reheat individual donuts in the microwave for 8-10 seconds to restore warmth and softness. Avoid refrigeration as it dries out the texture and makes donuts stale more quickly.
Duck Donuts Recipe

Craving those irresistible Duck Donuts but don’t want to leave your kitchen? This duck donuts copycat recipe brings the magic of the beloved donut shop right to your home.
Ingredients
- 4 cups (500g) all-purpose flour
- ¼ cup (50g) granulated sugar
- 1 teaspoon salt
- 2¼ teaspoons instant yeast
- 1 cup (240ml) whole milk
- ¼ cup (60g) unsalted butter
- 1 teaspoon vanilla extract
- 3–4 cups vegetable oil
- 1½ cups chocolate frosting
- Sprinkles
Instructions
Step 1: Make the Dough
In the bowl of a stand mixer, add flour, sugar, salt, and instant yeast. Mix briefly to combine using the dough hook attachment. If using active dry yeast instead, activate it first in warm milk before proceeding. In a microwave-safe bowl, combine milk and butter. Heat for 30-45 seconds until the butter melts completely and the milk reaches a warm temperature-not hot, as excessive heat can kill the yeast. Stir vanilla extract into the warm milk mixture until well incorporated.
Turn the mixer to medium speed and slowly pour the wet mixture into the dry ingredients. Mix until the dough comes together into a shaggy mass. Knead for 6–8 minutes on medium speed until the dough becomes soft, smooth, and slightly elastic. The dough should pull away from the sides of the bowl. If kneading by hand, work the dough on a lightly floured surface for about 10 minutes until it develops elasticity and becomes smooth to the touch.
Step 2: First Proof
Lightly oil a clean bowl with vegetable oil, ensuring the entire interior surface is coated. Place the dough into the bowl, turning it over once to coat all sides lightly in oil. This prevents the dough from drying out during proofing. Cover tightly with plastic wrap or a clean kitchen towel and let it proof in a warm, draft-free place for 1½ to 2 hours. The dough should double in size and feel fluffy and airy when gently pressed.
Step 3: Shape the Donuts
Turn the proofed dough onto a lightly floured work surface. Gently press it down to release excess air. Using a rolling pin, roll out the dough to about ½ inch thickness. For slightly larger, fluffier donuts, aim for closer to ¾ inch thickness. Using a 3-inch round cutter dipped in flour, cut out circles by pressing straight down without twisting. This ensures clean edges that puff up nicely when fried. Use a smaller cutter (about 1 inch) to cut out the center holes. Remove the centers carefully. Place the shaped donuts on a tray lined with parchment paper, spacing them about 2 inches apart. Gather the donut holes and set them aside separately-they’ll proof and fry faster than the full donuts.
Step 4: Second Proof
Cover the donuts loosely with plastic wrap and drape a clean kitchen towel over the top to maintain humidity. Let proof for 20–30 minutes in a warm spot until the donuts become puffy, slightly rounded, and spring back slowly when gently touched. Don’t over-proof, or they may absorb too much oil during frying.
Step 5: Fry the Donuts
In a heavy-bottomed saucepan or Dutch oven, add oil to a depth of 2–3 inches. The vessel should be deep enough that oil won’t overflow when donuts are added. Heat oil over medium heat until it reaches approximately 350°F (175°C) on a cooking thermometer. If you don’t have a thermometer, test by dropping a small piece of dough into the oil-it should sizzle immediately and rise to the surface. Carefully slide 4–5 donuts into the hot oil using a slotted spoon or spider strainer.
Don’t overcrowd the pan, as this lowers the oil temperature. Fry for 2–3 minutes on the first side until they develop a beautiful golden-brown color. Flip gently using chopsticks or a slotted spoon and fry for another 2 minutes until evenly browned on both sides. Remove donuts and place on a tray lined with several layers of paper towels to absorb excess oil. Let them drain briefly. Fry the donut holes separately-they’ll cook slightly faster, usually 1-2 minutes per side.
Step 6: Frost and Decorate
While the donuts are still warm (but not hot), dip the top of each donut into chocolate frosting. Hold the donut upside down and gently twist to ensure even coverage. Let excess frosting drip back into the bowl, then place the donut right-side up on a cooling rack set over parchment paper. Immediately add sprinkles, crushed cookies, or other toppings before the glaze sets-they need to stick to wet frosting. Allow the frosting to set for 10-15 minutes before serving for the best texture and appearance.
Notes
Store unfrosted donuts in an airtight container at room temperature for up to 2 days. Frosted donuts are best consumed within 24 hours. Reheat individual donuts in the microwave for 8-10 seconds to restore warmth and softness. Avoid refrigeration as it dries out the texture and makes donuts stale more quickly.
Nutrition Information:
Yield:
12Serving Size:
1Amount Per Serving: Calories: 220
Common Queries and FAQs
When you give this Duck Donuts Recipe a try, you might have a few questions. Don’t worry-we’ve rounded up answers to the most common ones to help you out.
Can I bake these donuts instead of frying them?
While this duck donuts recipe is specifically designed for frying, you can bake them at 375°F for 10-12 minutes until golden. However, the texture will be more cake-like and less authentic to the original Duck Donuts experience. Baked versions won’t achieve that characteristic crispy exterior with tender, fluffy interior.
What’s the difference between cake donuts and yeast donuts?
This cake donut recipe uses yeast for leavening but creates a denser, more tender crumb than traditional yeast donuts. True cake donuts use baking powder and have a tighter crumb structure. This recipe sits beautifully in between, offering the best of both worlds-yeast-risen fluffiness with cake donut tenderness.
Can I make the dough ahead of time?
Yes! After the first proof, punch down the dough, cover tightly, and refrigerate for up to 24 hours. This cold fermentation actually develops deeper flavor. When ready to use, let the dough come to room temperature for 30 minutes before rolling, cutting, and proceeding with the second proof.
Why are my donuts greasy?
Greasy donuts typically result from oil that’s too cool (below 340°F). When oil isn’t hot enough, donuts absorb excess oil instead of quickly developing that protective golden crust. Always monitor oil temperature and allow it to return to 350°F between batches.
Can I use a different type of milk?
Whole milk provides the richest flavor and best texture, but 2% milk works as an acceptable substitute. Avoid skim milk as it produces drier donuts. Non-dairy alternatives like oat milk or almond milk can work, though the flavor and texture will differ slightly from the traditional duck donuts copycat recipe.
What if I don’t have a stand mixer?
You can absolutely make this dough by hand! Mix ingredients in a large bowl, then knead on a floured surface for about 10 minutes until smooth and elastic. The process takes slightly longer but yields equally delicious results. Your arm muscles will get a good workout!
How do I know when the oil is the right temperature without a thermometer?
Drop a small piece of dough into the oil. If it sizzles immediately and rises to the surface within 2-3 seconds, turning golden brown in about a minute, your oil is ready. If it sinks and browns slowly, the oil is too cool. If it browns within seconds, it’s too hot.
This duck donuts recipe empowers you to recreate that beloved donut shop experience in your own kitchen with confidence and creativity. Whether you’re perfecting the classic chocolate-frosted version or experimenting with unique flavor combinations, the foundation remains the same: soft, fluffy, absolutely irresistible donuts that rival any bakery offering.
The techniques you’ve learned-from proper proofing to temperature control-translate beyond just how to make duck donuts and can elevate all your baking endeavors. Now that you’ve mastered this duck donuts copycat recipe, every weekend can become a special occasion filled with warm, fresh-from-the-fryer donuts that bring joy to everyone around your table.
We’d love to hear how this recipe turns out for you! Give it a try, then drop a comment below to share your thoughts and tips with us.
You can also follow us on Pinterest, and YouTube for more delicious updates and kitchen inspiration. Your feedback and support mean the world to us!