
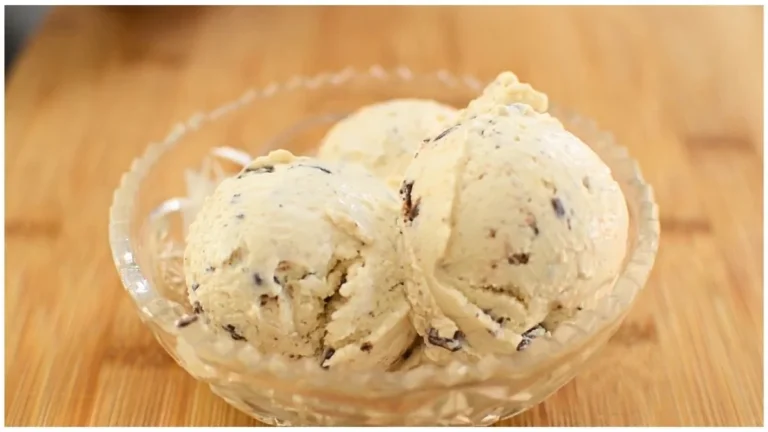

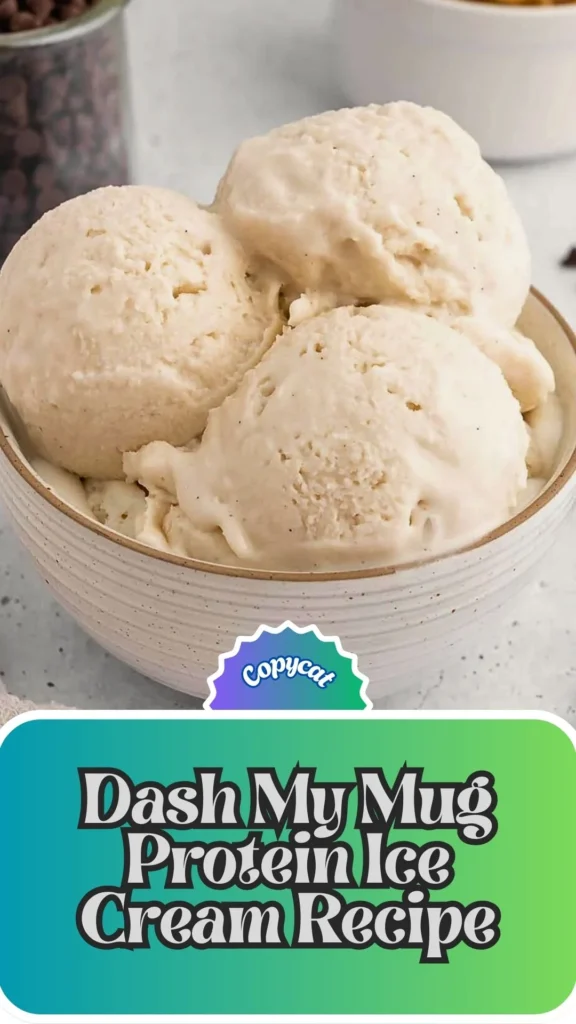
Craving a guilt-free frozen dessert that packs a protein punch? This dash my mug protein ice cream recipe transforms simple ingredients into a lusciously creamy treat that rivals any store-bought pint. Using Greek yogurt as the base, this copycat dash my mug protein ice cream recipe delivers incredible texture and flavor without an ice cream maker.
Whether you’re a fitness enthusiast looking for post-workout refreshment or simply want a healthier dessert alternative, this protein ice cream recipe satisfies sweet cravings while supporting your nutritional goals.
With natural peanut butter, honey, and coconut milk creating the perfect balance of protein, healthy fats, and natural sweetness, you’ll wonder why you ever bought commercial protein ice cream.
What Does Dash My Mug Protein Ice Cream Taste Like?
This dash my mug protein ice cream delivers a rich, creamy experience reminiscent of premium frozen yogurt with a delightful peanut butter undertone. The Greek yogurt base provides a subtle tang that balances beautifully with the natural sweetness of honey, while coconut milk adds velvety smoothness and a whisper of tropical flavor.

The natural peanut butter contributes nutty richness without overwhelming the palate, creating a sophisticated flavor profile that’s neither too sweet nor too plain.
When you fold in dark chocolate chunks, each spoonful offers satisfying textural contrast-smooth, creamy ice cream punctuated by crisp chocolate bursts. The overall taste is clean, refreshing, and satisfying, with none of the artificial aftertaste found in many commercial protein desserts.
Dash My Mug Protein Ice Cream Recipe Ingredients and Kitchen Utensils
Ingredients
- Greek yogurt (plain, unsweetened, preferably 2% fat) – 2 cups (strained overnight to remove excess whey/moisture for better texture)
- Natural peanut butter – ⅓ cup (can substitute with almond butter or other nut butter)
- Honey – ¼ cup
- Vanilla extract – 2 teaspoons
- Coconut milk – ⅔ cup (adds creaminess and subtle coconut flavor)
- Dark chocolate (finely chopped) – 50 g (optional, for chocolate bursts; creates a chocolate frozen yogurt-style version)
Kitchen Utensils Needed
- Fine mesh strainer or cheesecloth-lined colander
- Large mixing bowl
- Hand mixer or whisk
- Rubber spatula
- Shallow freezer-safe container with lid
- Measuring cups and spoons
- Ice cream scoop
Preparation and Cooking Time
Prep Time: 15 minutes (plus overnight straining for yogurt)
Freezing Time: 3-4 hours (with periodic stirring)
Total Time: 3-4 hours (plus overnight straining)
Servings: 6-8 servings
Copycat Dash My Mug Protein Ice Cream Recipe
Step 1: Strain the Greek Yogurt
Place 2+ cups of plain Greek yogurt in a fine mesh strainer or cheesecloth-lined colander positioned over a bowl. Let it drain in the refrigerator overnight, or for at least 4-6 hours, to remove extra liquid. This crucial step prevents icy crystals and ensures your dash ice cream maker recipes achieve that signature creamy texture.
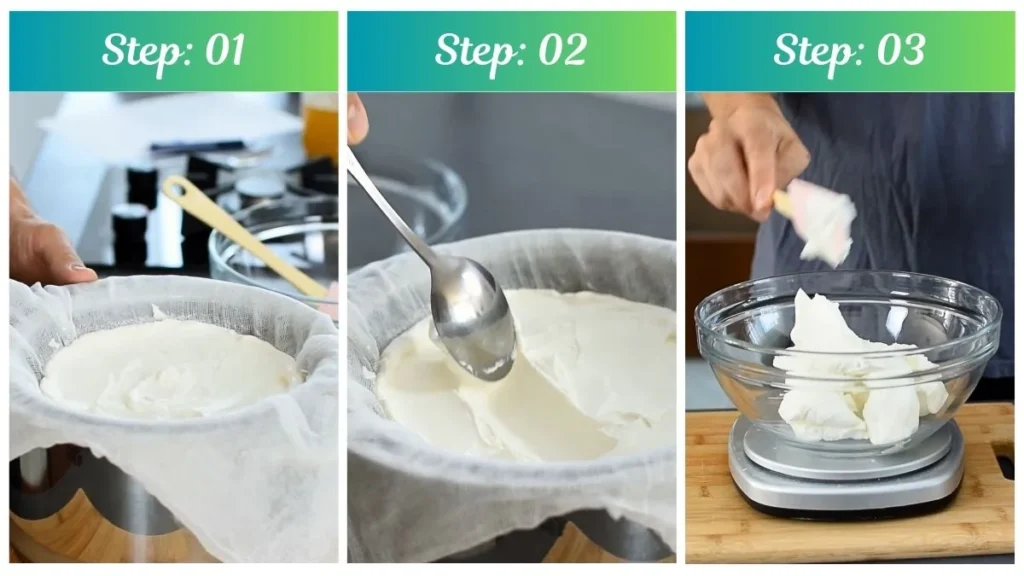
Step 2: Combine the Base Ingredients
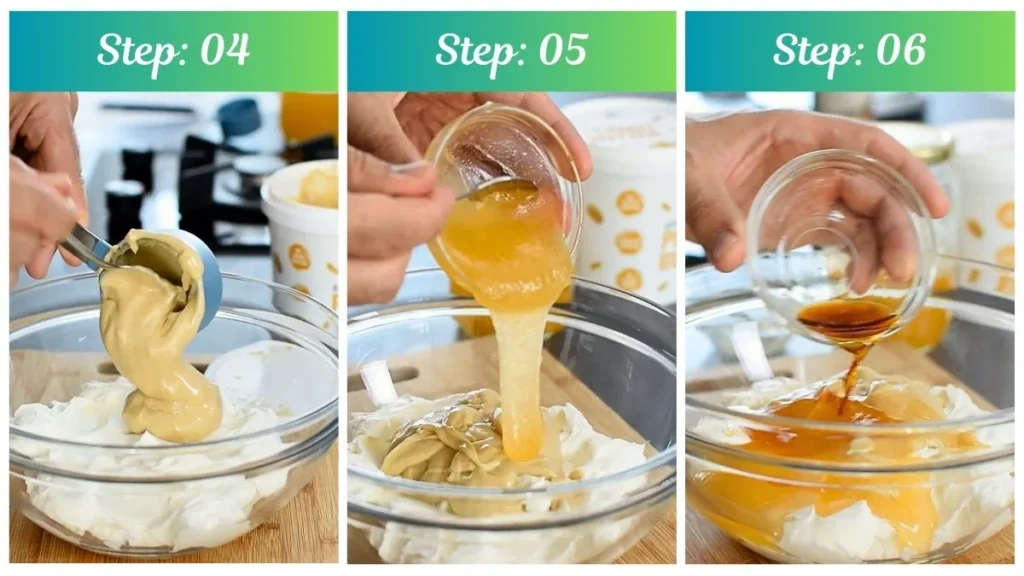
In a large mixing bowl, add 2 cups of strained Greek yogurt, ⅓ cup natural peanut butter, ¼ cup honey, 2 teaspoons vanilla extract, and ⅔ cup coconut milk. This combination creates the foundation for your homemade protein ice cream recipe.
Step 3: Mix Until Smooth
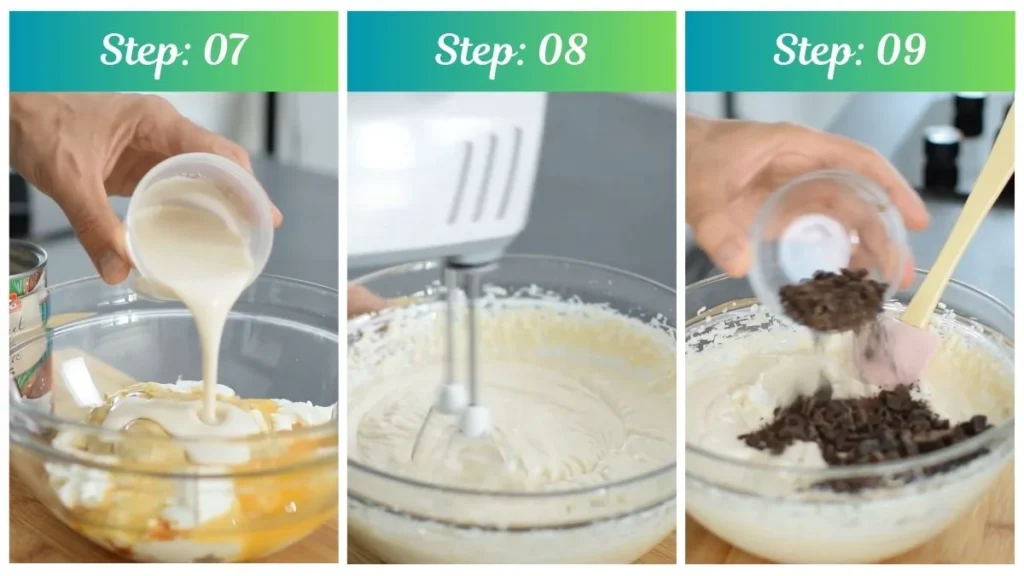
Use a hand mixer or whisk vigorously by hand to combine all ingredients thoroughly until the mixture becomes creamy, uniform, and completely smooth with no streaks of peanut butter remaining.
Step 4: Add Chocolate (Optional)
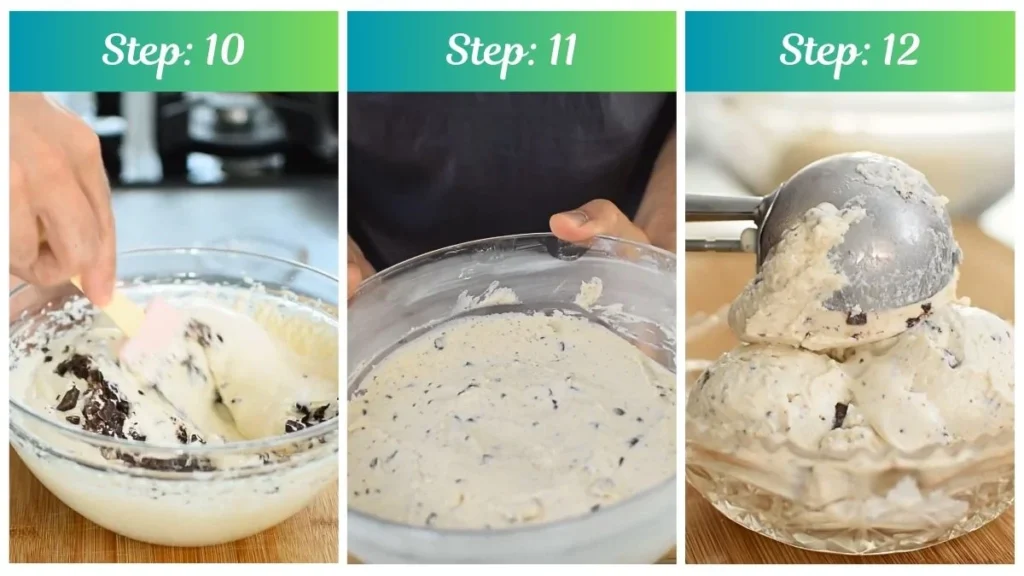
Fold in 50 g of finely chopped dark chocolate using a rubber spatula, distributing the pieces evenly throughout the mixture for delightful chocolate bursts in every spoonful.
Step 5: Freeze with Stirring Method
Transfer the mixture to a shallow, freezer-safe container or bowl. Cover and place in the freezer. After 45 minutes, remove and stir vigorously with a rubber spatula, scraping the frozen edges into the softer center. Flatten the surface, re-cover, and return to the freezer. Repeat this stirring process every 30 minutes for 2-3 hours (typically 3-5 total stirs) until it reaches a soft-serve or scoopable ice cream consistency.
Step 6: Alternative Quick Method
If you’re short on time, freeze the mixture until completely solid, then let it sit at room temperature for 5-10 minutes before scooping to soften slightly.
Step 7: Serve and Enjoy
Scoop your homemade dash my mug protein ice cream into bowls and enjoy plain, or customize with your favorite toppings like granola, fresh berries, a drizzle of extra honey, or crushed nuts.
Customization and Pairing Ideas for Your Protein Ice Cream
1. Chocolate Lover’s Paradise
Transform your basic recipe into a double-chocolate experience by adding 2 tablespoons of unsweetened cocoa powder to the base mixture alongside the chopped dark chocolate. Top with chocolate protein granola and cacao nibs for an intensely chocolatey dessert that satisfies the deepest cravings.
2. Berry Bliss Swirl
Create a fruity twist by blending ½ cup of fresh or frozen strawberries, blueberries, or raspberries and swirling them into the mixture before the final freeze. Pair with fresh mint leaves and a handful of sliced almonds for a refreshing summer treat that adds antioxidants to your protein boost.
3. Cookie Dough Dream
Fold in small pieces of your favorite protein cookie dough or make a quick chickpea-based edible cookie dough for safe consumption. Add mini chocolate chips and serve alongside a warm protein brownie for an indulgent dessert board that impresses guests.
4. Tropical Getaway
Enhance the coconut milk’s natural flavor by adding ¼ cup of unsweetened shredded coconut to the base and topping with diced mango, pineapple chunks, and toasted macadamia nuts. This variation works beautifully when paired with coconut macaroons or served in hollowed-out coconut shells for a stunning presentation.
5. Nutty Banana Foster
Swap the peanut butter for almond or cashew butter, then layer in sliced bananas before freezing. When serving, drizzle with sugar-free caramel sauce and sprinkle with toasted pecans. This pairs exceptionally well with banana bread or protein pancakes for a complete breakfast-dessert hybrid.
6. Coffee House Classic
Mix in 2 tablespoons of espresso powder or strong cooled coffee to the base for a sophisticated coffee-flavored protein ice cream. Top with crushed biscotti, chocolate-covered espresso beans, and a dollop of whipped coconut cream for a café-worthy experience at home.
7. Spiced Autumn Delight
Incorporate ½ teaspoon each of cinnamon and nutmeg with a pinch of ginger to create a warm, spiced version perfect for fall. Serve with crumbled graham crackers, a drizzle of maple syrup, and candied pecans. This variation pairs beautifully with apple crisp or pumpkin bread for seasonal entertaining.
Essential Tips for Perfect Dash My Mug Protein Ice Cream
1. Master the Yogurt Straining Process
The overnight straining step isn’t optional-it’s the secret to achieving creamy, non-icy texture in your my mug ice cream maker recipes. Use full-fat or 2% Greek yogurt rather than fat-free versions, as the fat content contributes significantly to mouthfeel and prevents crystallization. If you’re in a rush, you can reduce straining time to 4 hours minimum, but overnight produces superior results.
2. Choose Your Nut Butter Wisely
Natural peanut butter with just peanuts and salt works best because it lacks the stabilizers found in conventional brands that can create grainy texture when frozen. Ensure your nut butter is at room temperature before mixing-cold nut butter creates lumps that are difficult to incorporate smoothly. Stir any separated oil back into your nut butter jar before measuring for consistent results.
3. Optimize Your Sweetener Strategy
Honey acts as both sweetener and texture enhancer because its natural properties prevent excessive ice crystal formation. If you prefer less sweetness, reduce honey to 3 tablespoons but don’t eliminate it completely, as it serves a functional purpose beyond flavor. For a different flavor profile, substitute with pure maple syrup or agave nectar in equal amounts.
4. Perfect the Stirring Technique
The periodic stirring method mimics what an ice cream churner does-breaking up ice crystals as they form. Use a sturdy rubber spatula to scrape thoroughly along the bottom and sides of your container, then fold the frozen portions into the center. This labor-intensive process makes the difference between icy frozen yogurt and luxurious protein ice cream. Set a timer on your phone so you don’t forget the 30-minute intervals.
5. Container Selection Matters
Choose a shallow, wide container rather than a deep, narrow one for faster, more even freezing. Metal containers conduct cold more efficiently than plastic or glass, speeding up the process. Whatever container you select, ensure it has a tight-fitting lid to prevent freezer burn and absorption of other food odors that can compromise flavor.
6. Temperature Control for Serving
Remove your protein ice cream from the freezer 5-10 minutes before serving if it’s been frozen for more than 24 hours. Homemade ice cream freezes harder than store-bought versions because it lacks commercial stabilizers and emulsifiers. For easier scooping, run your ice cream scoop under hot water between each scoop, or use a sturdy metal spoon warmed slightly in hot water.
7. Flavor Development Through Resting
Your copycat dash my mug protein ice cream recipe actually tastes better after resting in the freezer for 6-8 hours, allowing flavors to meld and mature. The honey’s sweetness becomes more pronounced, the peanut butter’s nuttiness deepens, and the overall flavor profile becomes more cohesive. Consider making your batch the night before you plan to serve it for optimal taste and texture development.
Storage and Reheating Guidance
Store your dash my mug protein ice cream in an airtight, freezer-safe container for up to two weeks. Press plastic wrap directly onto the surface before sealing with the lid to prevent ice crystals from forming. Always allow it to soften at room temperature for 5-10 minutes before scooping for the best texture and easiest serving.
Dash My Mug Protein Ice Cream Recipe
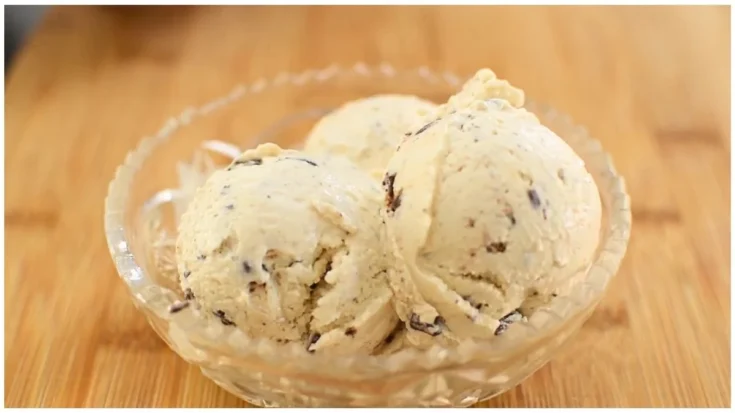
Craving a guilt-free frozen dessert that packs a protein punch? This dash my mug protein ice cream recipe transforms simple ingredients into a lusciously creamy treat that rivals any store-bought pint. Using Greek yogurt as the base, this copycat dash my mug protein ice cream recipe delivers incredible texture and flavor without an ice cream maker.
Ingredients
- Greek yogurt (plain, unsweetened, preferably 2% fat) – 2 cups (strained overnight to remove excess whey/moisture for better texture)
- Natural peanut butter – ⅓ cup (can substitute with almond butter or other nut butter)
- Honey – ¼ cup
- Vanilla extract – 2 teaspoons
- Coconut milk – ⅔ cup (adds creaminess and subtle coconut flavor)
- Dark chocolate (finely chopped) – 50 g (optional, for chocolate bursts; creates a chocolate frozen yogurt-style version)
Instructions
Step 1: Strain the Greek Yogurt
Place 2+ cups of plain Greek yogurt in a fine mesh strainer or cheesecloth-lined colander positioned over a bowl. Let it drain in the refrigerator overnight, or for at least 4-6 hours, to remove extra liquid. This crucial step prevents icy crystals and ensures your dash ice cream maker recipes achieve that signature creamy texture.
Step 2: Combine the Base Ingredients
In a large mixing bowl, add 2 cups of strained Greek yogurt, ⅓ cup natural peanut butter, ¼ cup honey, 2 teaspoons vanilla extract, and ⅔ cup coconut milk. This combination creates the foundation for your homemade protein ice cream recipe.
Step 3: Mix Until Smooth
Use a hand mixer or whisk vigorously by hand to combine all ingredients thoroughly until the mixture becomes creamy, uniform, and completely smooth with no streaks of peanut butter remaining.
Step 4: Add Chocolate (Optional)
Fold in 50 g of finely chopped dark chocolate using a rubber spatula, distributing the pieces evenly throughout the mixture for delightful chocolate bursts in every spoonful.
Step 5: Freeze with Stirring Method
Transfer the mixture to a shallow, freezer-safe container or bowl. Cover and place in the freezer. After 45 minutes, remove and stir vigorously with a rubber spatula, scraping the frozen edges into the softer center. Flatten the surface, re-cover, and return to the freezer. Repeat this stirring process every 30 minutes for 2-3 hours (typically 3-5 total stirs) until it reaches a soft-serve or scoopable ice cream consistency.
Step 6: Alternative Quick Method
If you’re short on time, freeze the mixture until completely solid, then let it sit at room temperature for 5-10 minutes before scooping to soften slightly.
Step 7: Serve and Enjoy
Scoop your homemade dash my mug protein ice cream into bowls and enjoy plain, or customize with your favorite toppings like granola, fresh berries, a drizzle of extra honey, or crushed nuts.
Notes
Store your dash my mug protein ice cream in an airtight, freezer-safe container for up to two weeks. Press plastic wrap directly onto the surface before sealing with the lid to prevent ice crystals from forming. Always allow it to soften at room temperature for 5-10 minutes before scooping for the best texture and easiest serving.
Nutrition Information:
Yield:
6Serving Size:
1Amount Per Serving: Calories: 160