
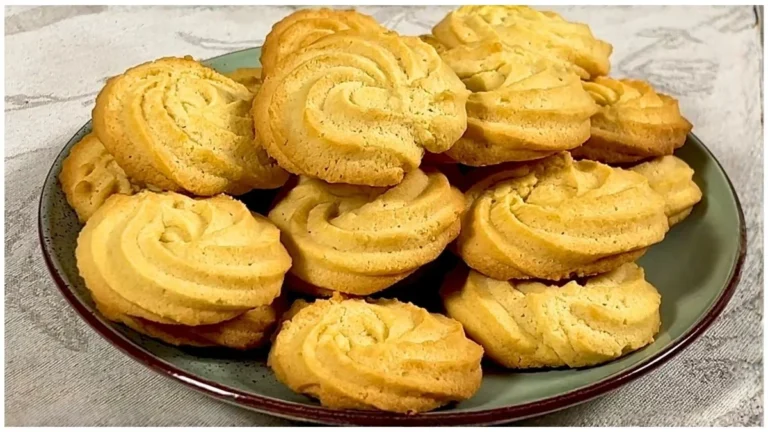
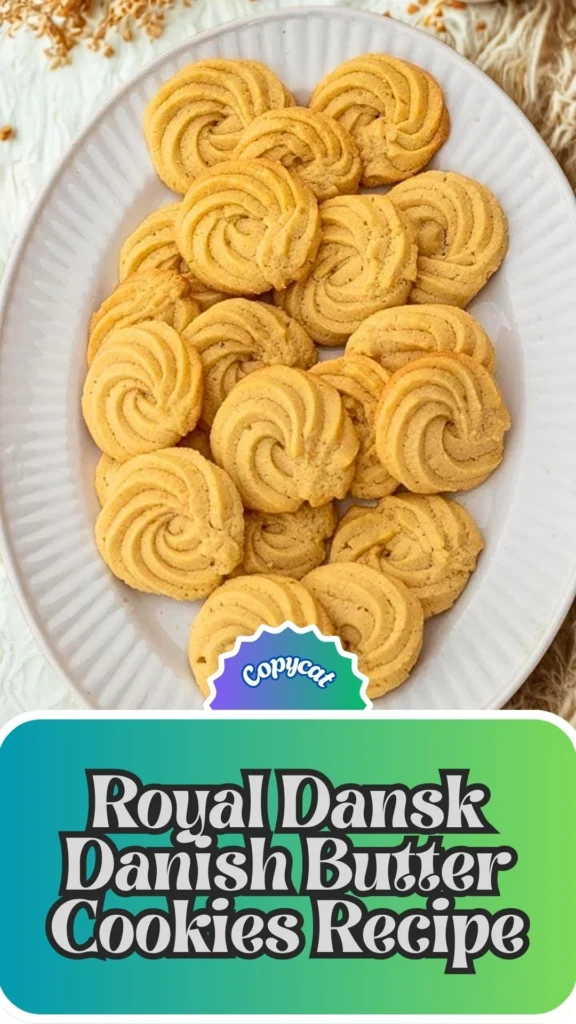
If you’ve ever savored those iconic blue tin cookies, you know the irresistible charm of royal dansk danish butter cookies. These delicate, buttery delights are synonymous with elegance and nostalgia, often gracing holiday tables and gift exchanges.
Learning how to make royal dansk danish butter cookies at home brings that same premium quality to your kitchen with simple ingredients and minimal effort. This royal dansk danish butter cookies recipe delivers those signature swirled shapes and crumbly, tender texture that literally melts on your tongue.
Whether you’re recreating childhood memories or starting a new baking tradition, these authentic Danish treats promise bakery-quality results every single time.
What Does Royal Dansk Danish Butter Cookies Taste Like?
Royal Dansk Danish butter cookies offer an exquisitely rich, buttery flavor that’s both sophisticated and comforting. The texture is the star here-incredibly tender and short, with a delicate crumble that dissolves instantly on your palate.
You’ll notice subtle notes of vanilla complementing the pure butter taste, while the corn flour creates that characteristic sandy, melt-in-your-mouth quality. These cookies aren’t overly sweet, which allows the premium butter flavor to shine through.
The edges deliver a slight crispness that contrasts beautifully with the soft, crumbly interior. Each bite feels luxurious yet light, making them dangerously easy to eat one after another.
Royal Dansk Danish Butter Cookies Recipe Ingredients
- Butter: 100g (softened, at room temperature)
- Fine Sugar: 60g (caster sugar or powdered/icing sugar)
- Egg Yolk: 1 (from 1 large egg)
- Egg White: 2 tsp (about 10-12ml)
- Cake Flour: 135g
- Corn Flour (cornstarch): 20g
- Vanilla Extract: ½ tsp
Kitchen Utensils
- Stand mixer or hand mixer
- Mixing bowls
- Piping bag with star nozzle
- Baking trays
- Parchment paper
- Wire cooling rack
- Sifter or fine-mesh strainer
- Rubber spatula
Preparation and Cooking Time
Prep Time: 15 minutes
Baking Time: 12-18 minutes
Total Time: 30-35 minutes
Yield: Approximately 20-25 cookies (depending on size)
How to Make Royal Dansk Danish Butter Cookies
Step 1: Preheat and Prepare
Preheat your oven to 160-175°C (320-350°F). Line your baking trays with parchment paper to prevent sticking and ensure even browning.
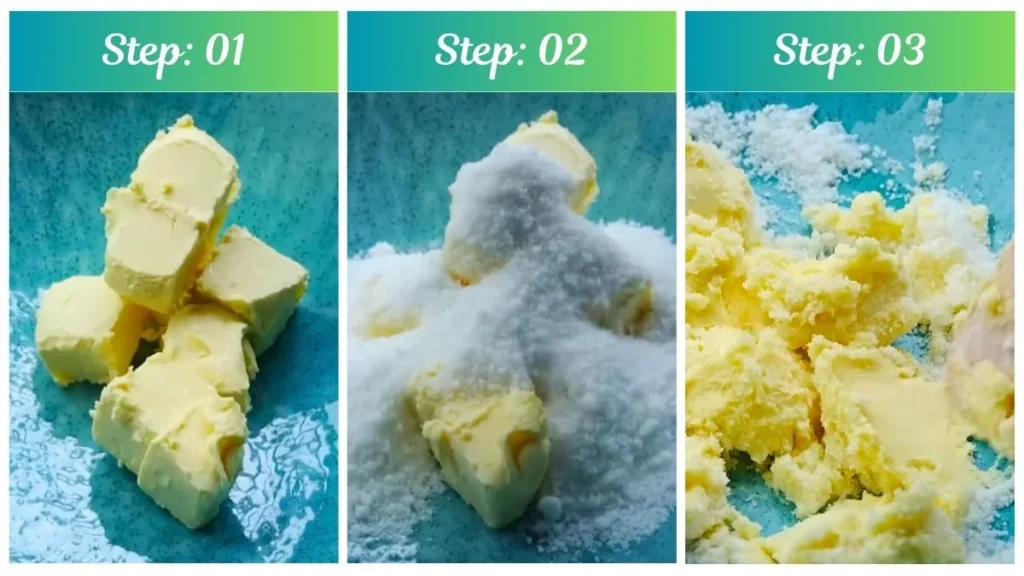
Step 2: Cream Butter and Sugar
In a mixing bowl, beat the softened butter and fine sugar together using a hand mixer or stand mixer on medium-high speed. Continue beating for 3-5 minutes until the mixture becomes light, fluffy, and noticeably pale in color. This crucial step incorporates air for that tender, delicate texture.
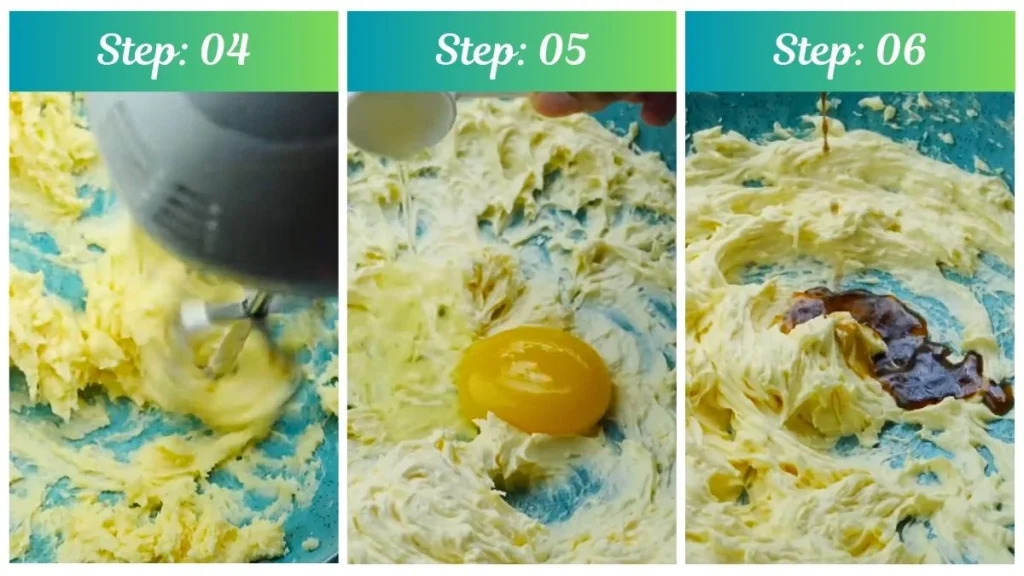
Step 3: Add Wet Ingredients
Add the egg yolk, 2 teaspoons of egg white, and vanilla extract to the butter mixture. Mix on medium speed until everything is well combined and smooth. Use a rubber spatula to scrape down the sides of the bowl to ensure even mixing.
Step 4: Incorporate Dry Ingredients
Sift together the cake flour and corn flour into a separate bowl. Gradually add this flour mixture to the butter mixture. Mix on low speed or fold gently with a spatula until just combined into a smooth, pipeable dough. Avoid overmixing, as this can develop gluten and make cookies tough rather than tender.
Step 5: Pipe the Cookies
Transfer the dough to a piping bag fitted with a star nozzle. Pipe the cookies onto the prepared baking sheets in classic shapes-round swirls, rings, or rosettes-spacing them about 1-2 inches apart as they may spread slightly during baking.

Step 6: Bake to Perfection
Bake in the preheated oven for 12-18 minutes, watching closely. The cookies are done when the edges turn lightly golden while the tops remain pale. They should have a slight golden color on the bottom and edges. Baking time varies based on oven temperature and cookie size.
Step 7: Cool Completely
Remove from the oven and let the cookies cool on the tray for 3-5 minutes to firm up. Carefully transfer them to a wire rack to cool completely.
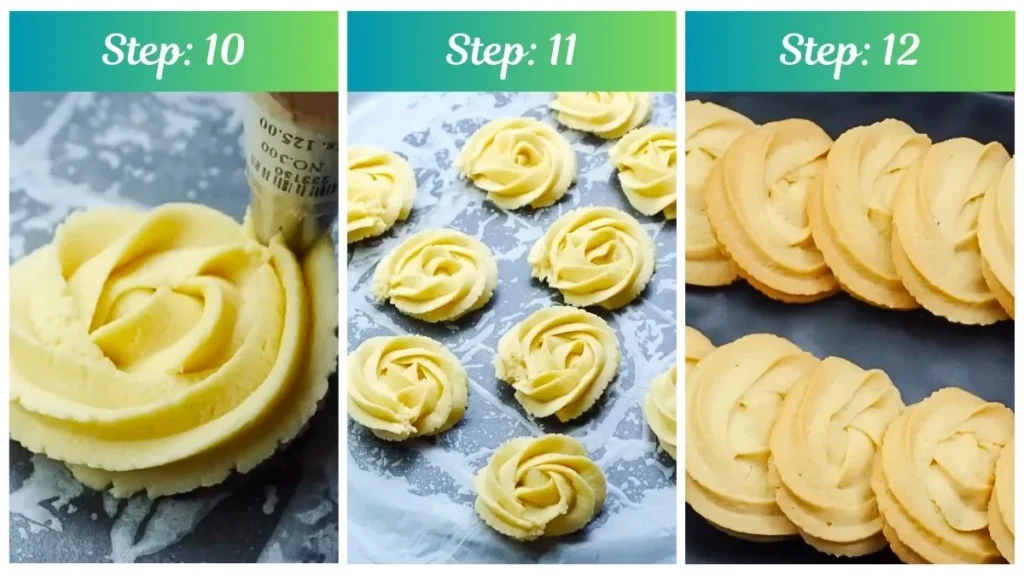
They’ll continue to firm as they cool and develop that signature buttery, crumbly texture.
Customization and Pairing Ideas for Serving
1. Chocolate-Dipped Elegance
Melt dark, milk, or white chocolate and dip half of each cooled cookie. Place on parchment paper until the chocolate sets. This adds visual appeal and a complementary richness that elevates the presentation for special occasions.
2. Citrus Zest Variation
Add ½ teaspoon of lemon or orange zest to the dough along with the vanilla. This bright, aromatic twist cuts through the richness and creates a more complex flavor profile perfect for spring and summer entertaining.
3. Almond Enhancement
Replace vanilla extract with almond extract, or add 2 tablespoons of finely ground almonds to the flour mixture. This creates a more traditional European flavor reminiscent of Danish bakeries.
4. Coffee or Tea Pairing
Serve these butter cookies alongside freshly brewed coffee, Earl Grey tea, or Danish-style hot chocolate. The buttery richness pairs beautifully with slightly bitter or aromatic beverages, creating a balanced tasting experience.
5. Ice Cream Sandwiches
Use two cookies to sandwich a small scoop of vanilla, strawberry, or salted caramel ice cream. Press gently and roll the edges in mini chocolate chips or chopped nuts for a sophisticated frozen dessert.
6. Jam-Filled Centers
Before baking, pipe a small amount of raspberry, apricot, or strawberry jam in the center of each cookie. The fruit preserves add moisture and a tart contrast to the buttery sweetness.
7. Gift Presentation
Layer these homemade cookies in decorative tins lined with parchment paper, separating layers to prevent breakage. Add a personalized label to create thoughtful, gourmet gifts for holidays, hostess presents, or special celebrations.
Essential Tips for Perfect Danish Butter Cookies Recipe
1. Room Temperature Butter is Critical
Your butter must be genuinely soft-not melted, not cold. It should leave a slight indent when pressed but still hold its shape. Properly softened butter creams better with sugar, creating more air pockets that result in lighter, more tender cookies.
2. Don’t Skip the Creaming Time
Beating butter and sugar for the full 3-5 minutes isn’t optional. This extended creaming incorporates essential air bubbles and creates the proper structure. The mixture should look almost white and have a mousse-like texture. Rushing this step yields dense, heavy cookies.
3. Use Cake Flour for Superior Texture
Cake flour has lower protein content than all-purpose flour, which means less gluten development. This is the secret to that signature tender, crumbly texture. If you must substitute, use 120g all-purpose flour plus 15g cornstarch to approximate cake flour’s properties.
4. Pipe Immediately
Once your dough is mixed, transfer it to the piping bag and work quickly. As the dough sits, the butter can warm up or cool down, changing the consistency and making piping difficult. If the dough becomes too soft, refrigerate the filled piping bag for 10 minutes.
5. Watch Oven Temperature Carefully
Danish butter cookies are notoriously finicky about temperature. Too hot, and they’ll brown too quickly before cooking through; too cool, and they’ll dry out. Use an oven thermometer to verify accuracy, and consider rotating trays halfway through for even baking.
6. Recognize Perfect Doneness
These cookies should never be golden brown all over-that means they’re overbaked. Look for pale tops with just barely golden edges and bottoms. They’ll seem slightly soft when you first remove them, but they firm up significantly as they cool to achieve that perfect texture.
7. Avoid Humidity on Baking Day
Butter cookies absorb moisture from the air, which can affect texture. Try to bake on low-humidity days, or store them with a silica gel packet. If your kitchen is humid, you might need to add 1-2 tablespoons more flour to achieve the proper dough consistency.
Storage and Reheating Guidance
Store cooled royal dansk danish butter cookies in an airtight container at room temperature for up to 2 weeks, or freeze for up to 3 months. Layer cookies with parchment paper to prevent sticking and breakage. These cookies are best enjoyed at room temperature and don’t require reheating.
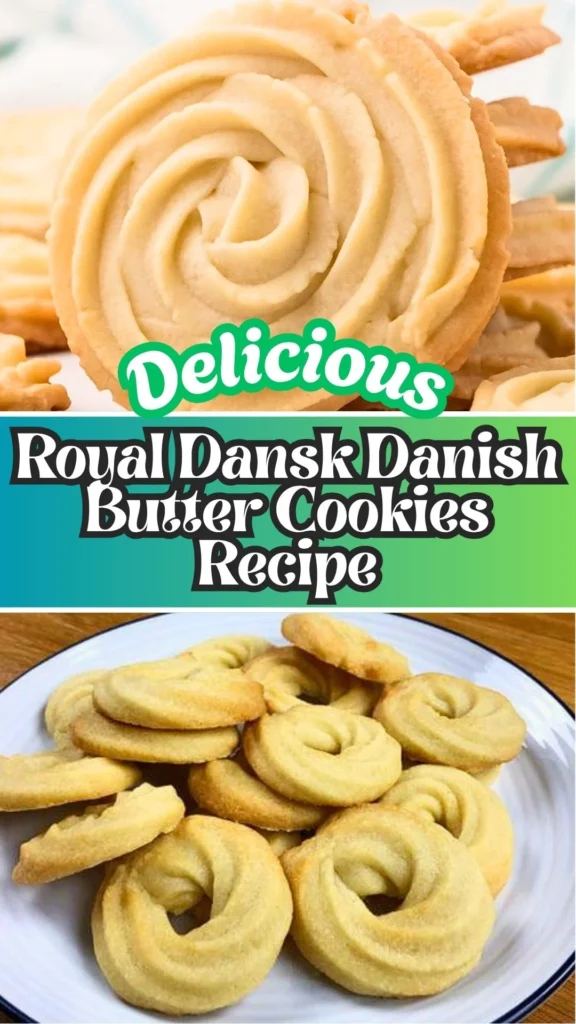
Royal Dansk Danish Butter Cookies Recipe

If you’ve ever savored those iconic blue tin cookies, you know the irresistible charm of royal dansk danish butter cookies. These delicate, buttery delights are synonymous with elegance and nostalgia, often gracing holiday tables and gift exchanges.
Ingredients
- Butter: 100g (softened, at room temperature)
- Fine Sugar: 60g (caster sugar or powdered/icing sugar)
- Egg Yolk: 1 (from 1 large egg)
- Egg White: 2 tsp (about 10-12ml)
- Cake Flour: 135g
- Corn Flour (cornstarch): 20g
- Vanilla Extract: ½ tsp
Instructions
Step 1: Preheat and Prepare
Preheat your oven to 160-175°C (320-350°F). Line your baking trays with parchment paper to prevent sticking and ensure even browning.
Step 2: Cream Butter and Sugar
In a mixing bowl, beat the softened butter and fine sugar together using a hand mixer or stand mixer on medium-high speed. Continue beating for 3-5 minutes until the mixture becomes light, fluffy, and noticeably pale in color. This crucial step incorporates air for that tender, delicate texture.
Step 3: Add Wet Ingredients
Add the egg yolk, 2 teaspoons of egg white, and vanilla extract to the butter mixture. Mix on medium speed until everything is well combined and smooth. Use a rubber spatula to scrape down the sides of the bowl to ensure even mixing.
Step 4: Incorporate Dry Ingredients
Sift together the cake flour and corn flour into a separate bowl. Gradually add this flour mixture to the butter mixture. Mix on low speed or fold gently with a spatula until just combined into a smooth, pipeable dough. Avoid overmixing, as this can develop gluten and make cookies tough rather than tender.
Step 5: Pipe the Cookies
Transfer the dough to a piping bag fitted with a star nozzle. Pipe the cookies onto the prepared baking sheets in classic shapes-round swirls, rings, or rosettes-spacing them about 1-2 inches apart as they may spread slightly during baking.
Step 6: Bake to Perfection
Bake in the preheated oven for 12-18 minutes, watching closely. The cookies are done when the edges turn lightly golden while the tops remain pale. They should have a slight golden color on the bottom and edges. Baking time varies based on oven temperature and cookie size.
Step 7: Cool Completely
Remove from the oven and let the cookies cool on the tray for 3-5 minutes to firm up. Carefully transfer them to a wire rack to cool completely. They’ll continue to firm as they cool and develop that signature buttery, crumbly texture.
Notes
Store cooled royal dansk danish butter cookies in an airtight container at room temperature for up to 2 weeks, or freeze for up to 3 months. Layer cookies with parchment paper to prevent sticking and breakage. These cookies are best enjoyed at room temperature and don’t require reheating.
Nutrition Information:
Yield:
20Serving Size:
1Amount Per Serving: Calories: 170
Common Queries and FAQs
When you give this Royal Dansk Danish Butter Cookies Recipe a try, you might have a few questions. Don’t worry-we’ve rounded up answers to the most common ones to help you out.
Q: Why did my cookies spread too much during baking?
A: Excessive spreading usually means the butter was too warm or the dough wasn’t chilled enough. Make sure your butter is softened but not greasy. If your kitchen is warm, chill the piped cookies for 15 minutes before baking.
Q: Can I use salted butter instead of unsalted?
A: While unsalted butter is preferred for controlling salt levels, you can use salted butter. Simply omit any additional salt and taste the dough-it should be slightly sweet with a mild buttery flavor, not noticeably salty.
Q: My dough is too soft to pipe. What should I do?
A: Refrigerate the dough in the piping bag for 10-15 minutes to firm up the butter. If it’s still too soft, you can gently fold in 1-2 tablespoons more cake flour, but do this sparingly to avoid tough cookies.
Q: Can I make the dough ahead of time?
A: Yes! Prepare the dough and refrigerate it in the piping bag for up to 24 hours. Let it sit at room temperature for 10-15 minutes before piping so it’s soft enough to work with easily.
Q: What’s the difference between using powdered sugar versus caster sugar?
A: Powdered sugar creates a slightly more tender, delicate texture because it dissolves more quickly. Caster sugar provides a bit more structure. Both work beautifully-choose based on your texture preference and what you have available.
Q: Why do my cookies taste bland?
A: This usually means you need better quality butter or more vanilla. Danish butter cookies rely heavily on premium butter for flavor. Also, ensure you’re using pure vanilla extract rather than imitation vanilla, which lacks depth and complexity.
Q: Can I add mix-ins like chocolate chips or nuts?
A: Traditional royal dansk danish butter cookies don’t contain mix-ins, as they would interfere with the delicate texture and piping. However, you can certainly press a sliced almond on top before baking or add finely ground nuts to the dough.
Mastering this royal dansk danish butter cookies recipe brings bakery-quality elegance right to your home kitchen. With their impossibly tender texture, rich buttery flavor, and beautiful piped shapes, these homemade royal dansk danish butter cookies rival the beloved store-bought version.
Now that you know how to make royal dansk danish butter cookies, you can create fresh batches for any occasion-from holiday gift-giving to afternoon tea parties. The simple ingredient list and straightforward technique make these sophisticated cookies surprisingly accessible for bakers of all levels. Happy baking!
We’d love to hear how this recipe turns out for you! Give it a try, then drop a comment below to share your thoughts and tips with us. You can also follow us on Pinterest, and YouTube for more delicious updates and kitchen inspiration. Your feedback and support mean the world to us!